In short: HTTP security headers are small instructions your server attaches to every response, telling the browser to "run this page under these rules". A few lines of configuration can reduce risks such as clickjacking, MIME-type confusion and data leakage, but a badly set header can break your site, so roll them out step by step.
When people think about securing a website, they usually think of the SSL certificate and strong passwords. Yet there is another cheap and effective layer on the browser side: response headers. When the server sends a page, it also sends rules such as "this page must not be shown inside a frame on another site" or "do not guess the content type", and the browser obeys them. This article covers the most common headers, what they do and how to add them on your hosting account.
When a browser requests a page, the server first sends the response headers and then the HTML. Security headers live in that first part and restrict what the browser will do. They do not change your site's code; they only tell the browser which actions are allowed. That is why they can be applied at web server level whether you run WordPress, custom software or a static site.
To see where you stand, one command in a terminal is enough:
curl -sI https://yourdomain.com | grep -iE "strict-transport|x-frame|x-content-type|content-security|referrer-policy|permissions-policy"
If nothing is printed, none of these headers is set on your site.
Tells the browser to connect to your site over HTTPS only. See What is HSTS? for details. If you have not finished moving to HTTPS, follow the HTTP to HTTPS migration guide first, because enabling HSTS during a half-finished migration can lock visitors out.
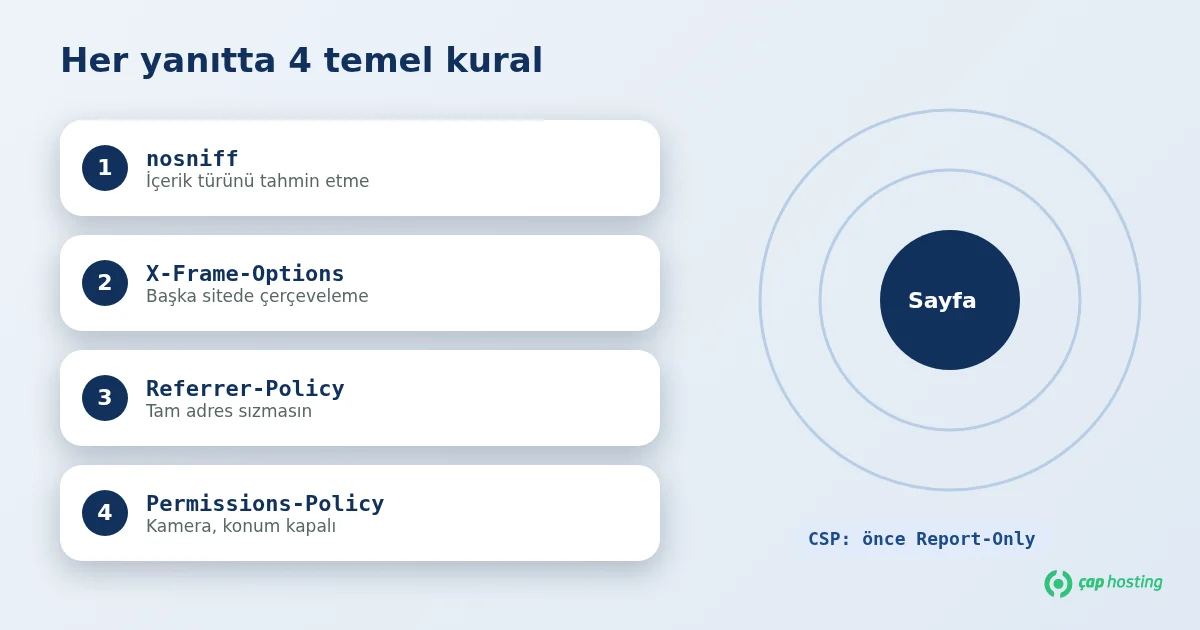
Its only valid value is nosniff. The browser trusts the declared Content-Type instead of inspecting the file and guessing, which prevents a file that looks like an image from being executed as a script. It is one of the safest headers to add right away.
Controls whether your page may be displayed inside an iframe on another site. An attacker can place an invisible frame under a fake button and trick visitors into clicking it; this is called clickjacking. Values:
DENY: the page can never be framed.SAMEORIGIN: only pages on your own domain can frame it.In modern browsers the CSP frame-ancestors directive does the same job, and using both is common. See the MDN documentation for details.
Decides which source address (Referer) is sent to the destination when a visitor clicks a link. URLs can contain search terms, user IDs or private paths, so you may not want the full address to leak. A balanced and common value is strict-origin-when-cross-origin: full URL within your own site, only the origin to other sites, and nothing when downgrading from HTTPS to HTTP.
Controls whether browser features such as camera, microphone and geolocation can be used by the page or by embedded content. If your site does not need them, turning them off reduces what a compromised third-party script could abuse. Example: camera=(), microphone=(), geolocation=().
The most powerful and the most demanding header. It lists the sources from which the page may load scripts, styles, images and fonts. Set up correctly, it can stop an injected malicious script from running (reducing XSS risk). But if you use external services such as ads, analytics, live chat or web fonts, each must be added to the policy, otherwise parts of the page stop working. That is why you should start in report-only mode (see below). The MDN CSP guide is a good reference.
| Header | Example value | Risk of breakage |
|---|---|---|
| X-Content-Type-Options | nosniff |
Very low |
| X-Frame-Options | SAMEORIGIN |
Low (affects you if your site is embedded elsewhere) |
| Referrer-Policy | strict-origin-when-cross-origin |
Low (some analytics tools lose referrer detail) |
| Permissions-Policy | camera=(), microphone=(), geolocation=() |
Low (remove any feature your site uses) |
| Content-Security-Policy | Start with Report-Only |
High (must be tested) |
Apache / LiteSpeed (.htaccess). If mod_headers is enabled, add this to the .htaccess in your site root:
Header always set X-Content-Type-Options "nosniff"
Header always set X-Frame-Options "SAMEORIGIN"
Header always set Referrer-Policy "strict-origin-when-cross-origin"
Header always set Permissions-Policy "camera=(), microphone=(), geolocation=()"
Nginx. Add to the relevant server block, test the configuration, then reload:
add_header X-Content-Type-Options "nosniff" always;
add_header X-Frame-Options "SAMEORIGIN" always;
add_header Referrer-Policy "strict-origin-when-cross-origin" always;
add_header Permissions-Policy "camera=(), microphone=(), geolocation=()" always;
nginx -t && systemctl reload nginx
For syntax details see the Apache mod_headers and Nginx headers module documentation. On shared hosting without server access, the .htaccess route is usually enough; if you cannot edit it, our support team can help.
Instead of enforcing CSP straight away, publish it first as Content-Security-Policy-Report-Only. The browser does not block violations; it only logs them in the developer console. A starting point:
Content-Security-Policy-Report-Only: default-src 'self'; img-src 'self' data: https:; frame-ancestors 'self'
Open the developer console (F12), browse your pages and review the "violates the Content Security Policy" messages. After adding the legitimate sources to the policy, you can publish it without Report-Only. If your site uses many inline scripts (common with WordPress plugins), this stage can take a while.
curl -sI first.No. Headers are only one defensive layer. Combine them with up-to-date software, strong passwords, regular backups and a web application firewall (WAF). If you manage the server yourself, the Linux server hardening guide is a good complement, and if you suspect an incident, follow hacked website recovery. The OWASP Secure Headers Project is another up-to-date reference.
Security headers are a low-cost, reversible improvement. Start with nosniff, X-Frame-Options, Referrer-Policy and Permissions-Policy, try CSP in report-only mode, and browse your site after every change. If you get stuck, open a support ticket and our team will help.
No direct ranking effect is expected, but a badly configured header that breaks page loading can hurt indirectly. Always check your site after changes.
Modern browsers no longer use that old XSS filter; protection comes from CSP and proper output encoding. Leaving it on an existing site does no harm, but it is not required on a new setup.
List the response headers with curl -sI https://yourdomain.com, or open the Network tab in your browser's developer tools and inspect the response headers of the request.
Adding them on the origin server is usually enough because the proxy passes them on. If you also add the same header in proxy rules, use only one place to avoid duplicates.
 Copyright © 2026 All Rights Reserved

 Turkey (Türkçe)
 Worldwide (English)